Getting Started with Flinter
Start a free trial, connect a sender, create your first campaign, add leads to it, and start sending — the steps to your first email going out.
Flinter is an AI-powered outbound platform for B2B teams. Each email in a sequence can be AI-drafted — from the trigger data on a lead, researched signals, or both — or written by you as a template with merge variables and spintax. Flinter then sends and tracks the emails for you, and surfaces replies in one shared inbox.
Once you have an account, getting your first campaign live means connecting a sender, creating a campaign and assigning that sender to it, adding your leads, writing your emails, and activating. Flinter then drafts for each lead, and you review them in Email Manager.
New workspaces start on a 14-day trial that includes lead enrichment and enough credits to run a real campaign. Settings → Plan & Usage shows how many days are left and what you've used — see Plans and Credits.
Create your account
Start the trial
Click Start free trial on flinter.ai. The page you land on reads Start your 14-day free trial — no card is needed.
Choose how to sign up
Sign up with Google, or create an account with an email and password — both start the same trial.
- Sign up with Google — click Sign up with Google and choose your account. Google asks you to confirm access for Flinter, then brings you back signed in.
- Email and password — enter your name (optional), your email, and a password of at least 8 characters, then click Create account.
Confirm your email
If you signed up with an email and password, Flinter sends a confirmation link to that address, and the page tells you to check your email. Click the link to activate your account and land in the product — you can open it on any device. No email after a minute? Check spam, or use Resend confirmation email.
Google signups skip this step — Google has already confirmed your address.
You land on Get Started, which is this guide in short form inside the product: the same steps, each one ticking off on its own as you finish it. A Setup strip across the top of every page shows how many are left and links back to it.
Both disappear once every step is done. You can close the strip at any time — Get Started stays in the left navigation until you've actually finished, and it's always available from Settings → Workspace.
Your workspace is named from your email domain, so emma@acme.com gets a workspace called Acme. Rename it whenever you like in Settings → Workspace, which also shows your Workspace ID — the thing to quote if you ever contact support, since workspace names don't have to be unique.
Flinter sets your sending timezone from your browser when you sign up, and the default window is 09:00–17:00, Monday to Friday. Check Settings → Send Schedule before you activate a campaign — this is what decides whether your emails land during your prospects' working hours.
Connect a sender
A sender is the mailbox your emails actually go out from — your own Outlook or Google Workspace address on your company domain, not a shared or throwaway domain.
Go to Senders
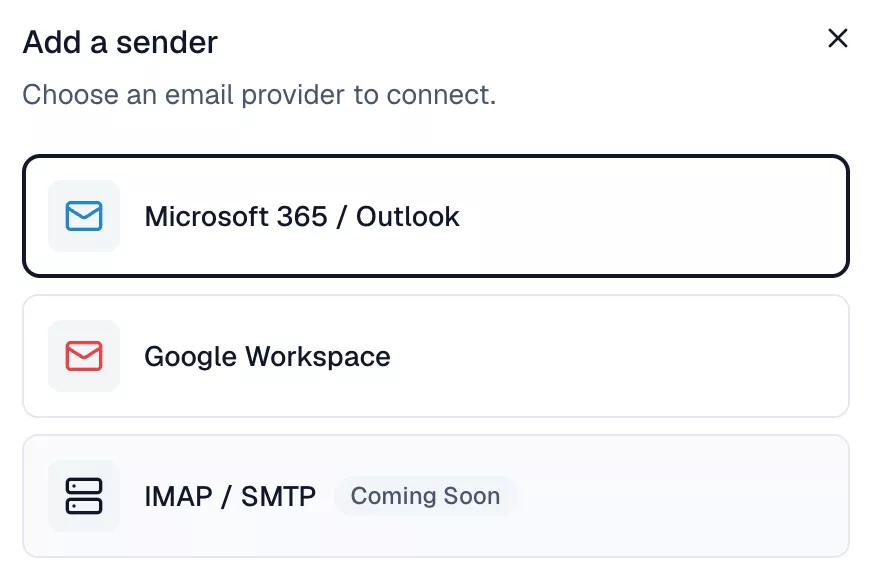
Open Senders from the left navigation, then click Add Sender.
Pick your provider
Choose Microsoft 365 / Outlook or Google Workspace. Each shows a one-time setup step, then a form for the sender's email address and display name.
@gmail.com, @outlook.com and the like — can't be connected yet; use a mailbox on your company domain. See Senders.
IMAP/SMTP sender support is coming soon — for now, connect via Microsoft 365 or Google Workspace OAuth.
Authorize the connection
Clicking Add & Connect Outlook (or Add & Connect Google Workspace) redirects you to Microsoft or Google to sign in and grant access.
Both providers may need your IT administrator. For Google Workspace, your admin has to whitelist Flinter's OAuth Client ID in the Google Admin Console before the connection will succeed. For Outlook, some organisations require an admin to approve Flinter before it can reach their mailboxes. The Add Sender dialog shows each as a setup step, and Senders has the full walkthrough for both. If you're not the admin, get them looped in first.
Once connected, the sender's status shows as active on the Senders page. If a connection ever breaks (a revoked token, an expired password), the sender's status flips to disconnected and a Reconnect button appears — click it to re-authorize.
Create your first campaign
Leads and email copy both live inside a campaign in Flinter, so create the campaign first.
Go to Campaigns
Open Campaigns from the left navigation, then click Create Campaign.
Name it
Give your campaign a name. Creating it takes you straight to its Settings tab.
Assign a sender
On the Settings tab, use Add senders to assign at least one connected mailbox to this campaign — leads enrolled here will send from it.
Each email in the sequence gets its own AI or Template choice in the campaign's Emails tab — AI writes from the lead's trigger data and any researched signals it has, Template uses copy you write with merge variables and optional spintax. Plus shared settings like sending schedule and auto-approval. See the Campaigns guide for the full walkthrough.
Add leads to your campaign
Open the campaign's Leads tab
From the campaign you just created, switch to its Leads tab, then click Add Leads.
Upload your CSV
Upload a CSV of the people you want to reach out to.
Map your columns
Flinter auto-matches your CSV columns to its own fields where it can. Review the mapping and correct anything it guessed wrong. Email and First Name are required; everything else — Last Name, Job Title, Lead Location, LinkedIn URL, Company, Website, Industry, No. of Employees, Company Description, Company LinkedIn URL, Company City, Company Country, and a free-text Trigger field — is optional but improves personalization quality.
Any CSV column you don't map to a Flinter field is silently dropped during import — it won't show up anywhere later. Double-check the mapping screen before continuing if you're not sure everything lined up.
Preview and import
Review the preview, then click Import N Leads to finish.
Once imported, every lead across every campaign is also visible in the workspace-wide Leads page in the left navigation, with search and filters across your whole workspace.
Write your emails and activate
Before a campaign can send anything, it needs email content and needs to be switched on. On the campaign's Emails tab, each position defaults to AI — write at least a system prompt and a first-email prompt, or switch any position to Template and write its Subject and Body instead.
Then go back to Settings and toggle the campaign from Draft to Active. Flinter checks a few requirements first — at least one lead enrolled, at least one connected sender, content for every position (a prompt for AI, a body for Template), and a gap between emails greater than zero — and lists anything missing before letting you activate. See Campaigns for the full settings and activation walkthrough.
Review and approve generated emails
Once active, Flinter starts generating emails for your leads. Open Email Manager (the home page) to review them — it's organized into tabs:
- Pending Approval — written, waiting for your review.
- Approved — reviewed and queued to send.
- Sent — delivered.
- Failed / Rejected — didn't go out, or you turned them down.
From the Pending Approval tab you can approve or reject emails individually or in bulk, and regenerate or hand-edit anything that doesn't read right before approving it. See Email Manager for the full walkthrough, including what rejecting an email actually does to that lead's enrollment.
If a campaign has auto-approve turned on, generated emails skip Pending Approval and move straight to Approved — worth knowing before you assume nothing's happening.
What happens next
Approved emails send automatically according to the campaign's schedule (days, hours, and timezone — either the workspace default or a campaign-specific override) and its gap between emails. You don't need to trigger sending manually.
When a lead replies, it lands in Inbox — a unified view across all your connected senders. From there you can reply, reply all, or forward, and reclassify a thread as Interested, Not Interested, OOO, Referral, or Unknown. Marking a thread OOO automatically pauses that lead's sequence for 7 days; reclassifying it away from OOO resumes it.
Next steps
- Campaigns — AI vs Template per email, prompts, templates, scheduling, and analytics in depth.
- Plans and Credits — what your plan includes and how credits are spent.
- Guides for Senders, Leads, and Inbox are on the way.